
Introduction
In the age of cloud computing, containerize applications are the way to go if you want to increase security and portability while saving costs. With Docker gaining more and more popularity these days, it suffices to say Docker is definitely going to be incorporated in the future of software development especially on the Continuous Integration / Continuous Deployment side. Every major cloud platform today support Docker container. As a software developer, you should definitely spend some time understanding the playing field.
This tutorial will guide you through the basic steps in packaging a Ruby On Rails application as a Docker Image. This is meant for those who are already familiar with RoR development but new to the Docker ecosystem.
Before you begin, it's essential that you know what Docker is and the basic terminology around it. Here's a good video to starts, and last but not least, you must have Docker installed (I'm using Docker for Mac) in this tutorial.
Setting up the stage
Before we go into Docker, let’s create a very simple Ruby on Rails application that we can use as for the course of this tutorial. If you have an existing application that you would want use, I suggest you do that after you familiar yourself with the landscape.
Let's start by Create a new Rails app
$ rails new awesome-rails && cd awesome-rails
Run bundler and run the Rails app it to make sure it’s created correctly.
$ bundle install
$ rails s
Next, create a Controller & Action that will response with a text whenever it's called.
class HomeController < ApplicationController
  def index
    render body: "Yep, I'm working..."
  end
end
And don’t forget to add the home#index route to config/routes.rb
Rails.application.routes.draw do
  root to: "home#index"
end
Refresh your browser to make sure it’s working
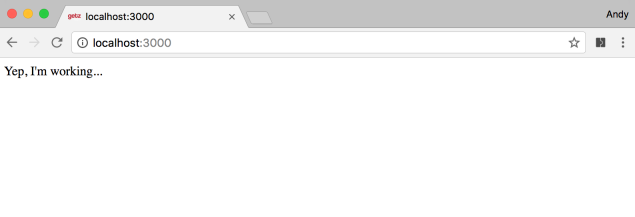
That’s it for the Rails app. We’re going to use this app for the rest of this tutorial.
The Goal is to create a Docker Image
To run the Rails app in Docker container, we first need to build a Docker Image. A Docker Image is essentially a snapshot of the system, which contains all the necessary components to run a piece of software. In this case, we need to create an image to run the Rails app created previously.
First thing first, makes sure Docker installed and it’s running. Since I'm using a Mac at the moment, I'll be using Docker for Mac, but the steps are generally same on other platforms.
Docker on Mac
Make sure your Docker installation is working correctly before you proceed, you can easily do this by running the Docker example container. e.g.
docker run hello-world
You can also check on the status by clicking on the Docker icon on the Menu Bar

Dockerfile – Recipe to build a Docker Image
When building a Docker Image, the Dockerfile is the central piece of information that is essential to create the Docker Image, it is a recipe which defines how an image needs to be built.
Let start by creating a Dockerfile, right at the root of our awesome-rails directory. Since this file is important, make sure you keep it in source control.
touch Dockerfile
Open you the Dockerfile with your favorites editor.
The first thing that we do in Dockerfile is to define what is the base image we’re going to use to create our image (most organization put their base image on Docker Hub). We can create an image entirely from scratch using the Ubuntu base image OR in this case, I’ll use the official Ruby image. You can check out how the Ruby image was built by looking at the Dockerfile on Docker Hub - https://hub.docker.com/_/ruby/ (the Dockerfile link is next to the version number tag)
So, define the base image at the beginning of the Dockerfile
# Base image from official Ruby repository
FROM ruby:2.3.1
The FROM keyword state that the base image is ruby:2.3.1
The base image only contains the necessary packages to run Ruby, not Rails, so we need to install all packages to run the Rails app.
# Install essential linux packages
RUN apt-get update -qq && apt-get install -y --no-install-recommends
    build-essential
    libpq-dev
    nodejs
    npm
    postgresql-client
    && rm -rf /var/lib/apt/lists/*
What this does is, it runs the apt-get update and install some of the common libraries that Rails needs to run. You can change this part to fit your needs. For example, if you have photo upload for your Rails app, you might want to include ImageMagick.
It's recommended that you combine all packages installation into a single RUN command, so that it only generate 1 layer (each RUN command generate a layer in the Docker Image), and that the installation runs in the same context. Notice that I also remove files under /var/lib/apt/lists/ that was leftover from apt-get command, this is to keep the image smaller.
Next, we define the working directory for the Rails app.
# Define where the application will live inside the image
ENV RAILS_ROOT /var/www/app

# Create application home. App server will need the pids dir
RUN mkdir -p $RAILS_ROOT/tmp/pids

# Set our working directory inside the image
WORKDIR $RAILS_ROOT
Here, I’ve set the working directory of the Rails app to /var/www/app, and created a "pids" directory for app server use. Any commands that we run later in this Dockerfile will use this directory as the current directory.
# Install bundler
RUN gem install bundler

# Use the Gemfiles as Docker cache markers and run bundle install before copy over app src
COPY Gemfile Gemfile
COPY Gemfile.lock Gemfile.lock

# Finish establishing our production Rails environment
RUN bundle install --deployment
Here, we install bundler, and copy the project's Gemfile and Gemfile.lock to the working directory inside the image, and run "bundle install" to install all the necessary gems. Note that we're using the "--deployment" flag to tell bundler to install gems in deployment mode.
At this stage, the Docker image working directory contains 2 files, the Gemfile, Gemfile.lock, and all the necessary gems. Project source code isn’t copied into the image yet. We do this first because if we need to rebuild the Docker Image (which definitely will happen), the Docker Engine will skip building the layer that hasn’t change. So, in this case, if the Gemfile & Gemfile.lock stays the same. The "RUN bundle install --deployment" line will not be run again. We’re essentially using the Gemfile and Gemfile.lock as a cache marker to improve the build time.
Copy files into image
Now we can copy the source code into the image
# Copy the Rails application into place
COPY . .
This would copy the entire directory from which you run docker build command into the working directory of the image.
You should create a .dockerignore file, and maintain a list of files that you do not need in the final image, especially files that contain secrets or development related configuration files.
Here’s an example of how a .dockerignore file looks like, the syntax is similar to a .gitignore file
$ cat .dockerignore
.DS_Store
.bowerrc
.byebug_history
.dockerignore
.env
.git
.gitignore
.idea
.vscode
Guardfile
README.rdoc
database.yml
docker-compose.yml
docker-compose.override.yml
gateway.conf
log/*
tmp/*
public/uploads/*
Now that the source codes are in, we can precompiled the assets.
RUN RAILS_ENV=production bin/rails assets:precompile
And lastly, specify the command to run the Rails app, say in this case we're just using the built-in Puma web server.
CMD rails server --port 3000
Here’s how the final Dockerfile looks like. It’s recommended that you put comments in your Dockerfile so other can understand why certain commands are run, and why they are in specific order.
# Base image from Ruby docker hub
FROM ruby:2.3.1

# Install essential linux packages
RUN apt-get update -qq && apt-get install -y --no-install-recommends
    build-essential
    libpq-dev
    nodejs
    npm
    postgresql-client
    && rm -rf /var/lib/apt/lists/*

# Define where the application will live inside the image
ENV RAILS_ROOT /var/www/app

# Create application home. App server will need the pids dir
RUN mkdir -p $RAILS_ROOT/tmp/pids

# Set our working directory inside the image
WORKDIR $RAILS_ROOT

# Install bundler
RUN gem install bundler

# Use the Gemfiles as Docker cache markers. Always bundle before copying app src.

COPY Gemfile Gemfile

COPY Gemfile.lock Gemfile.lock

# Finish establishing our Ruby enviornment
RUN bundle install --deployment

# Copy the Rails application into place
COPY . .

RUN RAILS_ENV=production bin/rails assets:precompile

CMD rails server --port 3000
Building the Docker Image
Now that the recipe is done, we can proceed to build the Docker Image. This is simply running the docker build command under the root directory of the Rails app.
docker build -t awesome-rails .

Okay, it's time to take a break. The docker build is going to take a while, especially the first time you run it. This command will automatically look for the Dockerfile in the current directory. The -t switch give the image a tag.
A while later...
Once the build completed, run docker images to a list of images on your system. Notice that the awesome-rails image are in the list.
docker images

Images built without a tag will show up as
You can also tag an image after the built.
docker tag a420ddf0b979 awesome-rails:0.1

Notice that I tag the image as awesome-rails:0.1, where the 0.1 indicate the version number. The basic naming convention of tagging Docker Image is:
:
But if you need to push your image to a remote Docker Registry (e.g. Docker Hub), you'll need to prefix the image name with a repository name. You can see the details here.
/ :
The Secrets
Remember in the previous section, when the docker image was built, no secrets files are copied into the image. This is because when you run a docker image on different environment, you would want it to adapts to the running environment. One way to do this is via an environment file.
Create an environment file .env and put the secrets in there. In this case, the awesome-rails app needs the SECRET_KEY_BASE environment variable to run. Remember, don’t include this in your source control.
# .env
SECRET_KEY_BASE=597eae9051c822c955c4e44f98e75b14beb7596845678e9bf8acab5fd02e7f12some000random00number00009c62c1b
Finally, run the Docker image in as container.
docker run --env-file .env -p 127.0.0.1:3001:3000 awesome-rails

Here, we specify that the environment variables will be feed from the .env file and port 3001 on the host is mapped to the port 3000 of the running container (Dockerfile specified that Puma server will be listening on port 3000).
Go ahead and browse to http://localhost:3001, you should see the same Rails app running.

Run docker ps to see all the running container; you see the awesome-rails image is running and there’s a Container ID assigned to it.
docker ps

To stop a running container, you can run docker stop command.
docker stop 08f39d048259
Docker will stop the running container with Container ID 08f39d048259. Note, the container is only stopped, it’s still live somewhere in the system. The container can also be restarted, or removed.
# To restart a container
docker restart 08f39d048259

# To remove stopped container
docker rm 08f39d048259
That's it, the Rails app runs perfectly in a container. If you want to run the image on a different machine, just install docker on it, and you're ready to go.

Conclusion
This tutorial only touches the surface of Docker, but I hope it gives you the general idea of how to get Rails working in Docker container. There's more to it when you need to run worker, if you're not using Puma, or if need to run Nginx on top of it.
Some other areas which you might be interested in exploring after you get familiar with building the docker image are:
- Using docker-compose to build docker image
- Putting a docker image on a Docker Registry (you can even setup your own private Docker Registry)
- Automate a docker image build
- Automate a docker image deployment
- Running container in Docker Swamp
Continue...
How to run Ruby on Rails on Docker (Part 2)
[…] that you have the general idea on how to run a Rails app on Docker, it’s time to get a little deeper and get it working with a database and […]
ReplyDeleteReally comfortable tutorial for beginners. Helped me, Thanks. I would request some additional references to get my hands on practice with "Automating a docker image build and deployment.
ReplyDeleteHi there, I've followed the tutorial and i'm stack on running the docker image.
ReplyDeleteFor some reason, I cannot access the container with the running application on the localhost:3001.
I have mac OS, i've done everything that is listed in the tutorial so far but cannot make it work with the image.
rails s -p does work though.
this is the output when running the docker image.
=> Booting Puma
=> Rails 5.2.0 application starting in development
=> Run `rails server -h` for more startup options
Puma starting in single mode...
* Version 3.12.0 (ruby 2.3.1-p112), codename: Llamas in Pajamas
* Min threads: 5, max threads: 5
* Environment: development
* Listening on tcp://localhost:3000
hmm, what's your `docker ps` output? can you try log into the bash terminal of the docker container after you ran it, and check if rails is running.
ReplyDeleteI found the issue, when you supply the --port argument to rails Puma will only listen to the local interface. Without --port it will listen to all interfaces.
ReplyDeleteto fix this need to add: -b 0.0.0.0 to thr CMD command and it works fine now.
tamoxifen
ReplyDeleteemkartofun34
ReplyDelete